How to lower CPU usage on Mac
Do you find yourself frequently starting at the spinning beach ball on your Mac — the moment when your apps slow down or grind to a halt?
If so, your Mac could be overtaxing its CPU with various simultaneous processes, which ultimately results in sluggish performance. Truth is, regardless of how powerful your Mac is, it only has so much CPU to allocate to everything you want to do, and sometimes it can hit its limits.
To make your Mac fast once again, you need to know how to check CPU usage on Mac and how to reduce CPU usage through quitting and optimizing various unnecessary processes.
But first, let’s define what CPU actually is.
What is CPU on Mac?
CPU (Central Processing Unit) is the core of any computing device, from your Mac to your iPhone or Apple Watch. Its job is to simply follow instructions it’s been given, which bundle together into processes.
An important metric of CPU productivity is CPU time (or processing time), which is measured by seconds your Mac’s CPU spends processing certain tasks. The longer any given task takes to complete the busier your system is and the more overloaded your CPU becomes.
If your Mac has high CPU usage, even the most simple tasks will become throttled and take a long time to be done. In other words, your performance will suffer significantly. Reaching 100% of CPU will essentially stall your Mac completely.
The good news is you can try to lower the CPU usage by detecting the underlying causes and monitoring all the active (and background) processes.
High CPU usage could be the sign of malware installed on your Mac and running various scripts. It could also mean that you’re trying to run too many tasks at once or you’re working in apps that are too intensive for your Mac. For example, exporting 4K video on an old MacBook Air through Final Cut Pro is probably not a great idea.
How to check CPU usage on Mac
Knowing which tasks or apps are consuming your CPU and slowing down your Mac could be challenging if you don’t know where to look.
Luckily, your Mac has a built-in utility to track all of its processes. It’s called Activity Monitor and can be accessed in the Applications (⌘ + Shift + A) ➙ Utility folder.
Launch Activity Monitor and make sure the filter up top is sorted by CPU usage. Now you’ll clearly see all the apps and processes that use the computing power of your Mac. At the bottom, you’ll see system as well as user processes summary and how much CPU is still available (idle).
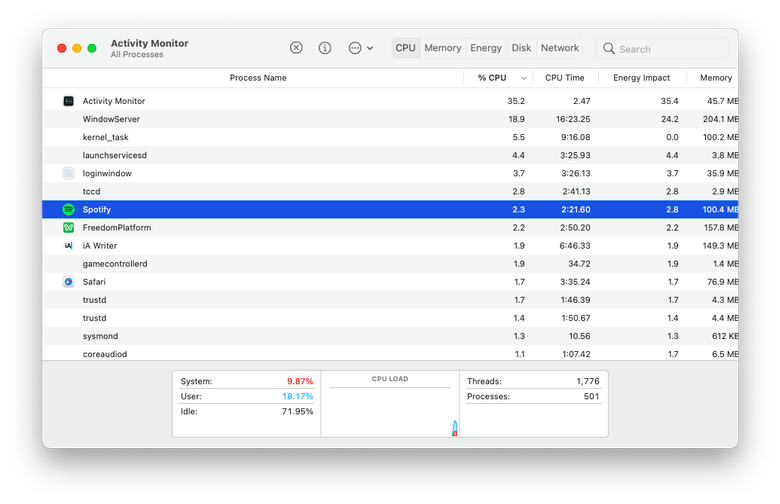
To lower your Mac’s CPU usage, you can quit any process you recognize as unimportant.
Note: Don’t quit all processes at random, as some of them are essential to the proper functioning of your Mac.
If the process is taking more than 100% of your CPU, it might be an indication that this process is out of control (frozen) and needs a reset.
To quit any process in Activity Monitor, simply highlight it and then click the Stop icon in the top bar.
How to reduce CPU usage automatically
While Activity Monitor is a helpful utility, it’s quite bothersome to run it all the time. Instead, you should really use a few third-party apps that make the monitoring process much more seamless.
iStat Menus, for example, is a super powerful utility that lives right in your menu bar and can show you every detail about your Mac at a glance, from CPU and GPU load to RAM usage, temperature, disk health, battery cycles, and more.
You can customize iStat Menus to your specific needs and then just click its icon to see everything you need to know in real-time graphs and percentages. If something looks wrong, just launch Activity Monitor from iStat Menus in one click and quit the process in question.
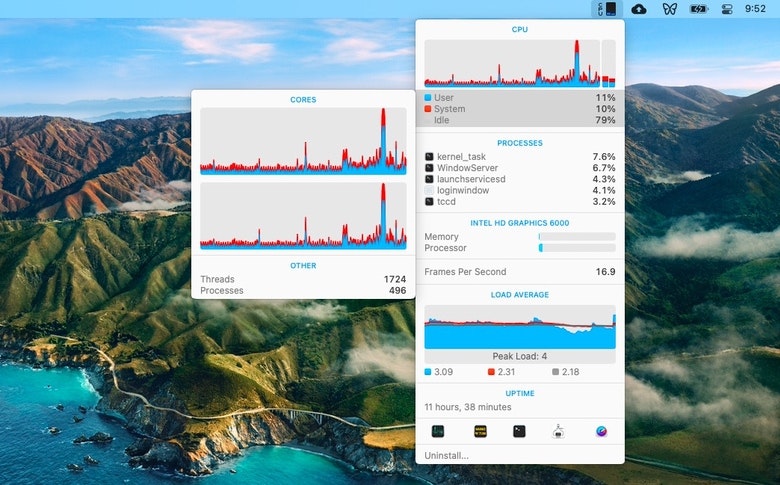
Both iStat Menus and Activity Monitor make tracking processes on your Mac easy. But what if you can’t quit all the processes that are taking over your CPU? Is there a way to contain them?
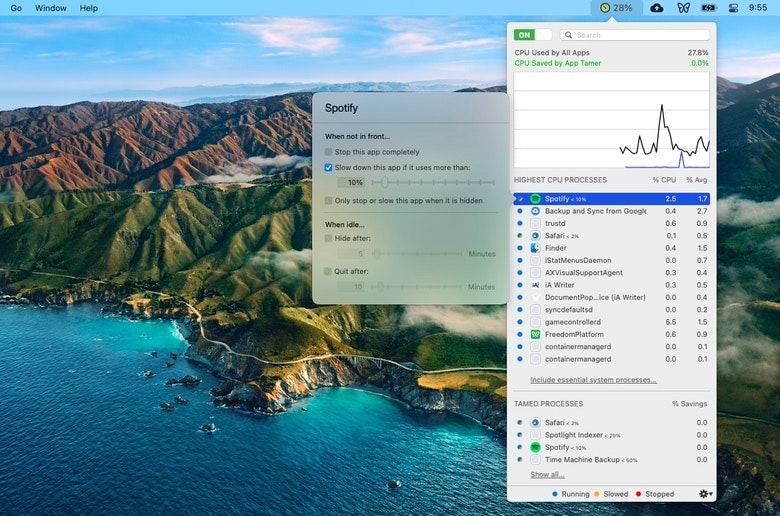
App Tamer is a brilliant CPU manager for your Mac. Similarly to iStat Menus, it tracks all your Mac’s processes and makes them available in a visual dropdown right in your menu bar (although you can filter out essential system processes). It also shows you the CPU load right on your menu bar, without clicking anything.
What’s unique about App Tamer, however, is its ability to limit the CPU load of any given app. To do so:
- Open App Tamer
- Click on any active app
- Check “Slow down this app if it uses more than”
- Enter the appropriate CPU percentage
What to do with the WindowServer Mac process?
Monitoring your active processes over time, you’ll without doubt notice that a WindowServer Mac process is often taking up a considerable part of your CPU. But what is it? Can you quit it?
WindowServer is one of the system processes and what it does is draw all the elements on your screen, from app windows to icons. So the amount of CPU that WindowServer is consuming is directly correlated to the amount of open windows you have on your Mac.
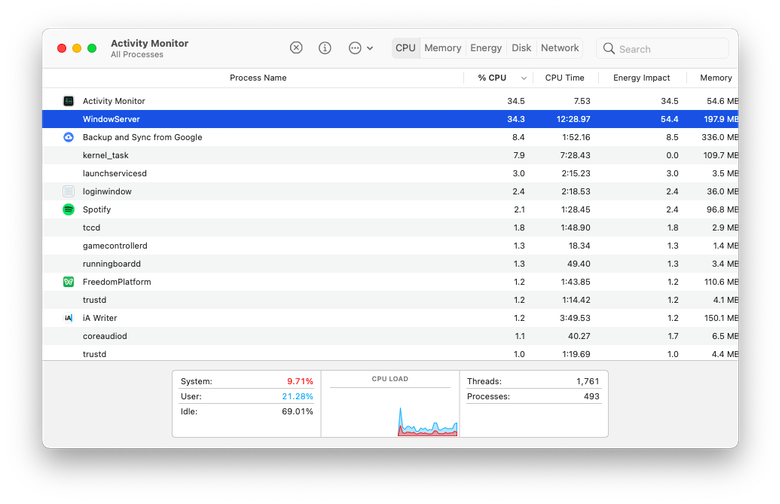
You can’t stop the WindowServer Mac process completely, but you can definitely lower its CPU usage:
- Close all the windows and apps you don’t need
- Reduce Transparency in the System Preferences ➙ Accessibility ➙ Display menu
- Delete all the extra Desktops in Mission Control
- Restart your Mac
As you can see, learning how to lower CPU usage is fairly easy. But even following all the advice about, in rare cases, might not produce the desired result.
Some additional tips to reduce CPU load are connecting your laptop to a power source, as your Mac could run slower on battery power, and upgrading your hardware if you find that you’re regularly running into 100% CPU usage.
For most people, however, monitoring CPU usage with iStat Menus and limiting certain apps' appetite with App Tamer should be more than enough.
Best of all, you can download iStat Menus and App Tamer absolutely free for seven days through the trial of Setapp, a platform with more than 210 top-rated Mac apps, from Disk Drill that recovers your hard drive in case of failure to Elmedia Player that handles any audio or video format with ease. Try every Setapp app today at no cost and see for yourself!


